Here's how to disable the IBM 600/E/X Trackpoint if it's giving you problems (uncontrolable drifting, 8611 boot errors, etc). I'm not sure who originally presented this information, but some history is available at thinkpads.com Support Forums. Please be very careful when performing this change!
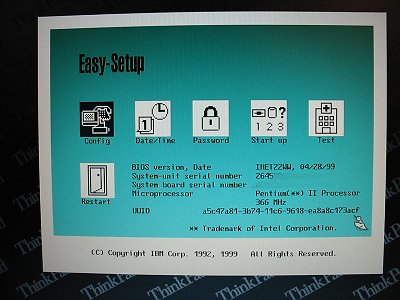 |
Begin by booting the system into the BIOS (Easy Setup) screen. This is done by holding down the F1 key, while turning the laptop on. Continue to hold the F1 key until you see the screen at left. In this example I am using a 600 system. The 600x will look a little bit different (it only has five icons). The icon at the left side represents the Config menu. It should already be highlighted with a black background but if it's not, use the arrow keys to do so. When the icon is selected, press the Enter key. |
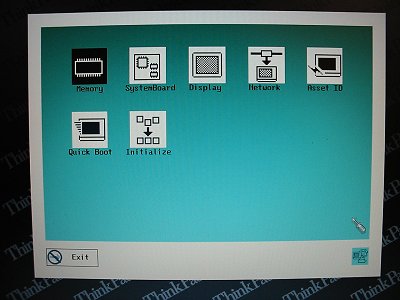 |
This is the Config(uration) menu. The only thing you need to do when presented with this screen is the press the CTRL-D key combination. This will activate the following configuration editor: |
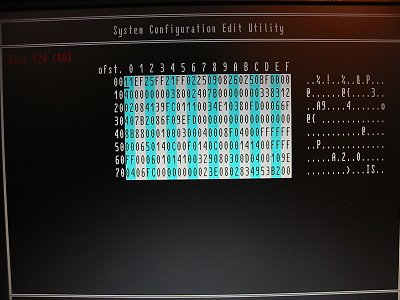 |
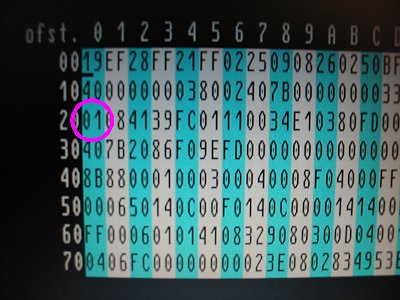
Here is the System Configuration Edit Utility. This table represents the contents of some of the CMOS memory in the laptop. The memory is arranged as a series of rows and columns. The rows are labeled 00 to 70 down the left side and the columns are 0 to F across the top. If you are familiar with numbering systems you will recognize this as a hexadecimal (base 16) display. This memory is used to retain some of the operational information of the system. It has been found that one particular location controls the activation of the trackpoint device. |
| Using the arrow keys, move the underline cursor to the third row of the first column. Check and make sure that there is a "02" displayed there. This value means that the trackpoint is enabled. To disable it, you must change it to a "01". If there is anything other than a "02" here, do NOT continue with these instructions! | |
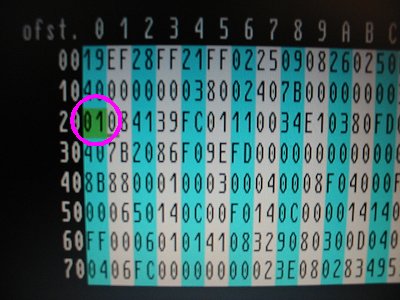 |
With the cursor at this location, type in a 0 (zero; NOT the letter "Oh") and then 1. The background should change to green as pictured here. |
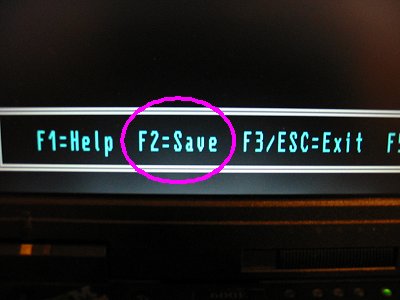 |
Down at the bottom of this edit utility screen are key commands. You must now press the F2 key to save the change that you made. Be sure that you have NOT altered any other location in this table before pressing F2! If you believe that another location has changed, then press the F3 or ESC key to exit without saving any changes. If you do exit without saving, then you are returned to the Config menu display. |
 |
If you had press the F2 key to save the change, then you should see this display. The green background is gone and the contents at the third row and first column now should show "01". |
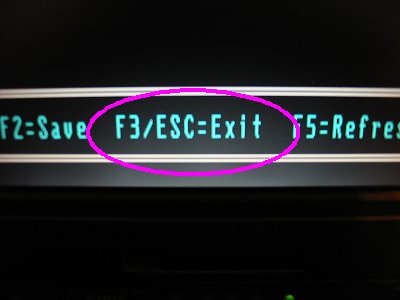 |
Now that the data has been changed, you must exit the edit utility. This is done with the F3 or ESC key. |
|
This will return you to the Config screen. Nothing to do here except press the ESC key to get back to... |
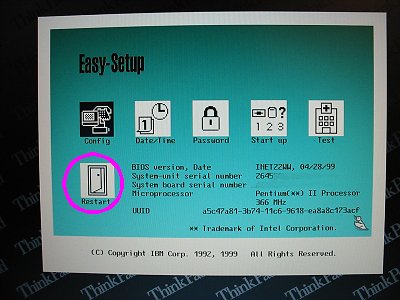 |
... the main BIOS screen. Use the arrow keys to highlight the Restart option and then press the Enter key to re-boot the 600 system. You now have a disabled trackpoint. Connect an external mouse and it should be active. The trackpoint will continue to be disabled until you reset the BIOS (remove the CMOS battery or use the Initialize function in the Config menu) or you use these instructions to go back and change the "01" to a "02". |